Introduction
Glow-in-the-dark powder is the secret ingredient behind countless magical craft projects — and it's far easier to use than you might think. Whether you're painting a galaxy ceiling, making custom candles, or adding a luminous touch to slime, this versatile pigment powder absorbs light during the day and releases it as a soft glow at night.
In this guide, we'll cover everything from what glow powder is and how it works, to the best mixing techniques, pro tips for brighter results, and how to choose a high-quality option. If you love personalizing shirts or decor with HTV, you'll also discover how glow powder fits into the broader universe of luminous crafting.
📚 Table of Contents
What Is Glow in the Dark Powder?
Glow-in-the-dark powder is a phosphorescent pigment made of tiny particles that absorb light energy and slowly release it as a visible glow in darkness. It works best when exposed to UV light, such as sunlight or bright indoor lighting, before being moved to a dark environment. This "charge and release" cycle is what makes it so magical for craft projects.
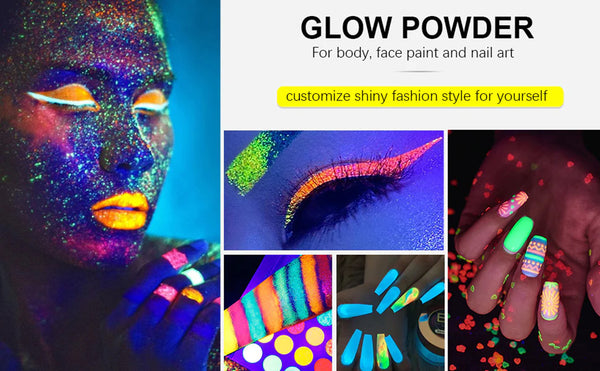
Common uses include wall murals, home decor, candles, body-safe lotions, cosmetics, paintings, and even slime. Because the powder is highly versatile, it can be mixed into a wide variety of mediums or applied directly to surfaces like wood, metal, and plastic.
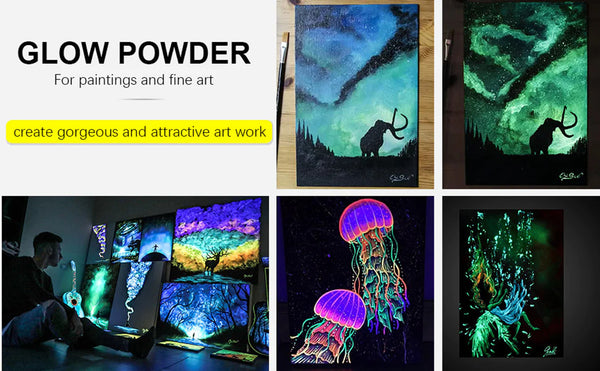
If you're already a fan of heat transfer vinyl, you'll appreciate how glow powder can expand your creative toolbox. While standard HTV comes in solid colors, pairing your fabric projects with glow-in-the-dark pigment opens the door to one-of-a-kind luminous effects in resin, paint, and more.
How to Use Glow in the Dark Powder
The most common and effective way to use glow powder is to mix it with a medium — such as paint, resin, wax, or nail polish. This method evenly distributes the pigment and ensures a consistent glow across your project.
Method 1: Mix with a Medium
-
Choose your medium. Acrylic paint, epoxy resin, candle wax, clear nail polish, and even slime bases all work beautifully.
-
Add a small amount of glow powder. Start with a ratio of roughly 1 part powder to 4 parts medium by volume. You can increase the ratio later if you want a brighter glow.
-
Stir thoroughly. Mix slowly to avoid clumping. If you're using resin, make sure the powder is fully incorporated before pouring.
-
Apply as usual. Paint, pour, brush, or mold your medium exactly as you normally would.
-
Charge it. Once dry, expose the finished piece to bright light for at least 10–15 minutes before testing it in the dark.
Method 2: Sprinkle and Press
For surfaces that can't be painted or coated, you can sprinkle the powder directly onto a slightly tacky surface — such as wet glue, uncured resin, or a fresh coat of paint — and gently press it in with your finger or a small tool. This creates a scattered, firefly-like effect that works especially well for galaxy art and textured walls.
More Tips for Brighter, Longer-Lasting Glow
Getting the brightest possible glow comes down to a few simple habits. Keep these tips in mind every time you work with glow powder:
-
Start with less. Add powder gradually. It's easier to increase brightness than to fix an over-pigmented mix.
-
Clean surfaces first. Oil, dust, and dirt can interfere with how evenly the pigment sits and glows.
-
Use light-colored backgrounds. Dark surfaces absorb light and make the glow appear weaker. White or pastel bases reflect light and enhance the effect.
-
Charge under strong light. The longer and brighter the exposure, the stronger and longer the glow. Direct sunlight or a UV flashlight works best.
-
Seal your work. After the powder is applied, consider sealing it with a clear top coat to protect it and extend its lifespan.
Quick Glow Powder Checklist
Before you start, run through these points to set yourself up for success:
- ✅ Medium selected (paint, resin, wax, nail polish, etc.)
- ✅ Powder added gradually, starting with a small amount
- ✅ Surface clean and free of oil or dust
- ✅ Light-colored base used whenever possible
- ✅ Finished piece charged under bright light before use
- ✅ Clear sealer applied for durability
Choosing the Best Glow in the Dark Powder
Not all glow powders are created equal — color range, safety, and storage matter just as much as brightness. If you're wondering where to start, a high-quality multi-color set can save you time and frustration.
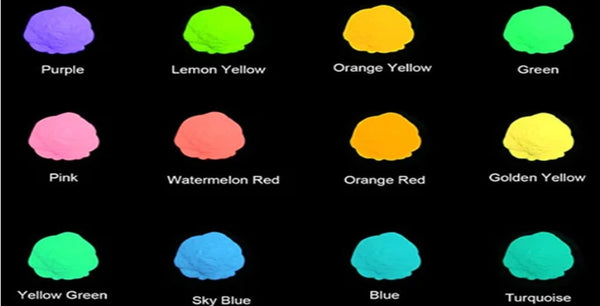
HTVRONT Glow-in-the-Dark Pigment Powder is an excellent choice for both beginners and experienced crafters. Its 12-color set includes rare shades like purple, watermelon red, yellow-green, and turquoise — giving you the flexibility to match almost any project. The powder is non-toxic and kid-friendly, so it's safe for family craft time.
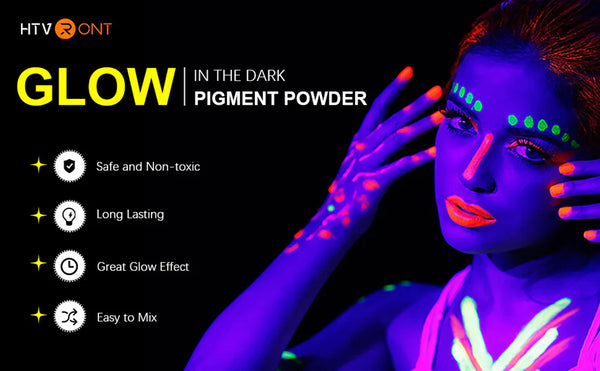
One thoughtful detail is the packaging: each bag features a rubber seal, which keeps the remaining powder dry and prevents accidental spills. That means your glow powder stays fresh and ready for your next project.
If you're not sure which powder to pick, or you're new to this craft, HTVRONT's set is a low-risk, high-reward starting point.

Troubleshooting Common Issues
Even with the best materials, a few problems can pop up. Here's how to solve them.
Glow fades too quickly
The issue: The powder glows briefly, then goes dark faster than expected.
Why it happens: Insufficient charging time, or too low a powder concentration.
The fix: Charge the item under bright UV light for at least 15 minutes. If the glow still fades quickly, increase the powder ratio slightly in your next batch. Keep in mind that glow duration varies by pigment quality — premium powders typically glow longer.
Powder clumps when mixed
The issue: The powder forms lumps instead of blending smoothly.
Why it happens: Adding powder too quickly, or mixing too aggressively.
The fix: Add powder in small amounts while stirring slowly. For resin, consider pre-mixing the powder with a small amount of part A before combining with part B to help break up clusters.
Glow looks weak on dark surfaces
The issue: The glow is barely visible on black or dark-colored objects.
Why it happens: Dark surfaces absorb light and compete with the powder's glow.
The fix: Apply a white or light-colored base coat before adding the glow powder. This reflects more light back through the powder and makes the glow appear significantly brighter.
Frequently Asked Questions
Is glow in the dark powder safe to use?
Yes — high-quality glow powder, like HTVRONT's, is non-toxic and safe for most craft applications. That said, always follow the manufacturer's guidelines. If you're using it in cosmetics, lotions, or anything applied to skin, verify that the product is explicitly labeled as skin-safe or cosmetic-grade. Keep powder away from eyes and avoid inhaling fine particles.
Can I mix glow powder with heat transfer vinyl?
Not directly — glow powder is designed to be mixed into liquid or semi-liquid mediums, not into vinyl itself. If you want a glowing effect on fabric, the best route is to use specially formulated glow-in-the-dark HTV, which already contains phosphorescent pigments and can be cut and pressed with a heat press. For non-fabric projects, mix glow powder into paint or resin and apply it to the surface.
How long does the glow last after charging?
Most high-quality glow powders will glow visibly for several hours after being fully charged, with the brightest output in the first 30–60 minutes. The exact duration depends on the powder concentration, the charging light source, and the surface it's applied to. To maintain the glow over time, recharge the item under bright light whenever you want it to shine again.
What surfaces work best with glow in the dark powder?
Light-colored, clean, non-porous surfaces produce the strongest glow. Porous surfaces like raw wood can absorb the powder unevenly, so it's usually best to seal them first. Smooth surfaces such as painted walls, resin, ceramic, metal, and glass all work beautifully — especially when a white or light base coat is used underneath.
Keep Learning
If you enjoyed learning about glow powder, these guides will help you master more creative materials and techniques:


 Cart Unlocks Add-On Deals





