Introduction
Making your own acrylic keychains is one of the most satisfying small crafts you can do — and one of the easiest to turn into a profitable side hustle. Whether you want to create personalized gifts, party favors, or a product line to sell, this guide walks you through two proven methods: adhesive vinyl and sublimation. Both produce beautiful, professional-looking keychains, but each has its own strengths.
We'll cover everything you need: the full supplies list, step-by-step instructions for both methods, side-by-side comparison, and the most common questions beginners ask. Ready to start your journey as a crafter? Let's dive in.
📚 Table of Contents
Supplies for Making Keychains
Before you start, gather all your materials. The list below covers both methods, so you'll be ready no matter which route you choose.
-
Acrylic keychain blanks — round, square, rectangle, or custom shapes
-
Adhesive vinyl — choose from solid colors, glitter, holographic, or patterned finishes
-
Sublimation paper — for photo-quality, full-color designs
-
Tassels — to add a finished, polished look
-
Awl — for piercing holes if needed
-
Pliers — for attaching jump rings and tassels
-
A cutting machine — Cricut, Silhouette, or HTVRONT vinyl cutter
-
Cutting mat — standard grip or light grip, depending on material
-
Weeding tools — a hook and fine-tip tweezers
-
Heat-resistant tape — for holding sublimation paper in place
-
Transfer tape — for adhesive vinyl application
-
A heat press — the HTVRONT H1 Mini Heat Press is ideal for small projects like keychains
Method 1: How to Make Acrylic Keychains with Adhesive Vinyl
Adhesive vinyl is the easiest way to make custom acrylic keychains — perfect for beginners or quick production runs. You don't need a heat press, and the process is forgiving. Here's how it works.
Step 1: Design Your Artwork
Open your cutting machine's software and create or import your design. Resize it to match your acrylic blank — a circle design for round keychains, a square or rectangle for corresponding shapes. If your design includes text, remember that adhesive vinyl does not require mirroring. You'll apply it face-up, so what you see on screen is exactly what you'll get.
Step 2: Cut the Vinyl
Place your chosen adhesive vinyl onto the cutting mat with the colored side facing up. Load the mat into your machine, select the appropriate adhesive vinyl setting, and send the design to cut. Make sure the mat position matches the on-screen layout to avoid cutting off-center.
Step 3: Weed the Design
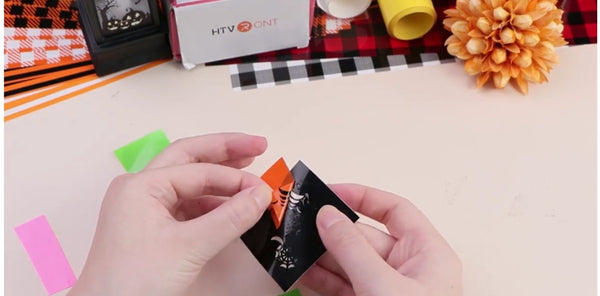
Use a weeding hook to remove the excess vinyl around your design. For small details and interior cutouts, switch to fine-tip tweezers. Work under bright light so you can see the cut lines clearly against the vinyl.
Step 4: Apply Transfer Tape
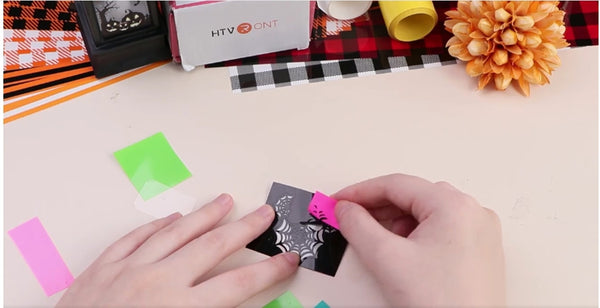
Cut a piece of transfer tape slightly larger than your design. Lay it over the weeded vinyl starting from the center and working outward to avoid air bubbles. Burnish firmly with a scraper so the design lifts cleanly from its backing.
Step 5: Transfer to the Acrylic Blank
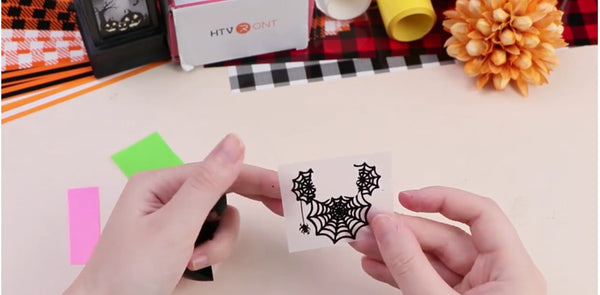
Clean the acrylic blank with rubbing alcohol and a lint-free cloth, then let it dry completely. Peel the transfer tape with the design attached and position it carefully on the blank. Press down firmly, burnish the entire surface, and peel the transfer tape away at a 45-degree angle.
Step 6: Add the Tassel
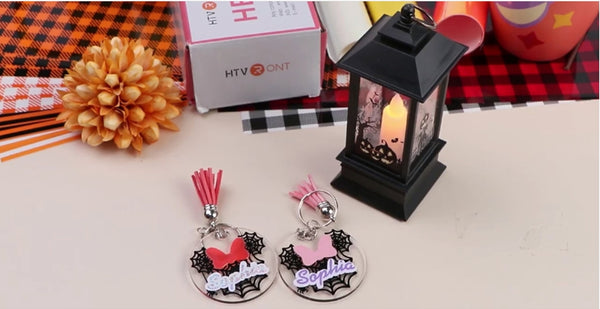
If your blank has a pre-drilled hole, attach a jump ring and tassel with pliers. If not, use an awl to create a small hole — but work slowly to avoid cracking the acrylic. Your custom keychain is finished!
Method 2: How to Make Acrylic Keychains with Sublimation Paper
Sublimation opens up a whole new world of color and detail — including photos. Unlike adhesive vinyl, which is limited to solid-color designs, sublimation lets you print full-color, photorealistic images directly onto the blank. The trade-off? You'll need a few more tools, including special ink and a heat press.
Step 1: Prepare Your Design
Open your design software and either create your design or drag a photo into the workspace. Resize it to match your acrylic blank. If your cutting machine supports "print-then-cut," you can add registration marks to ensure precise cutting later. Otherwise, plan to cut manually with scissors.
Step 2: Print with Sublimation Ink
Load sublimation paper into an inkjet printer equipped with sublimation ink. Standard printer ink won't work — it will fade quickly and transfer poorly. Print your design at the highest quality setting for the best color saturation.
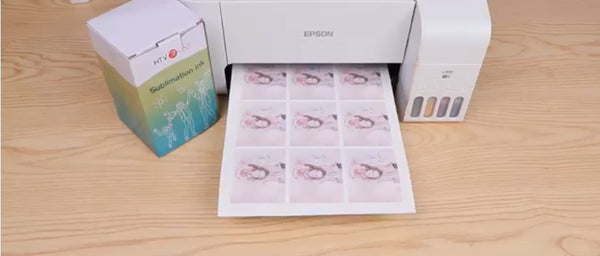
Step 3: Cut the Printed Design
If using print-then-cut, load the printed sublimation paper into your cutting machine and send the cut file. The machine will read registration marks and cut around your design precisely. If cutting manually, use sharp scissors and follow the printed outline carefully.

Step 4: Heat Press the Sublimation Transfer
Preheat your heat press to 400°F (204°C). Position the printed sublimation paper face-down onto the acrylic blank and secure it with heat-resistant tape. Press for 40–60 seconds with medium pressure. This high heat causes the sublimation ink to turn into gas and bond permanently with the polyester coating on the acrylic.
Step 5: Remove the Paper and Attach Hardware
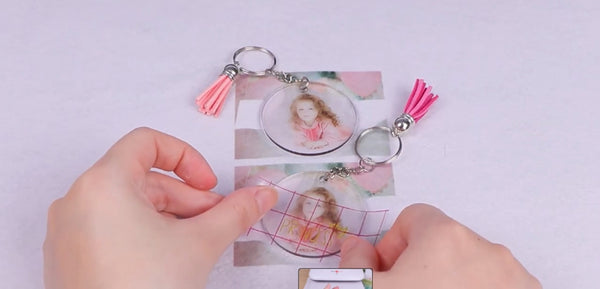
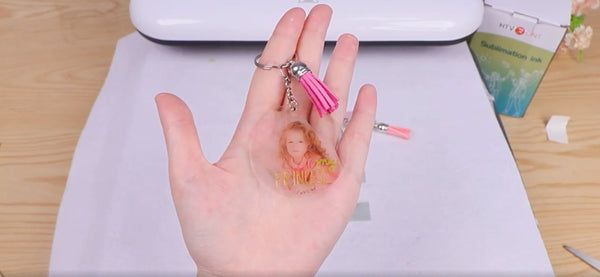
Carefully remove the keychain from the heat press and let it cool. Peel away the sublimation paper to reveal your design. Add a tassel and jump ring with pliers, and your photo-quality keychain is ready to gift or sell.
Which Method Should You Choose?
Both methods create beautiful keychains, but they shine in different situations. Here's a quick comparison to help you decide:
| Feature |
Adhesive Vinyl |
Sublimation |
| Color Range |
Solid colors, glitter, holographic, patterned |
Full-color, photorealistic, gradients |
| Equipment Needed |
Cutting machine + transfer tape |
Inkjet printer + sublimation ink + heat press |
| Difficulty |
Beginner-friendly |
Intermediate |
| Durability |
Good — hand-wash recommended |
Excellent — permanent, doesn't fade or peel |
| Best For |
Text-based designs, logos, quick production |
Photos, detailed artwork, gradient designs |
If you're new to crafting, start with adhesive vinyl. Once you're comfortable, add sublimation to your toolkit — it's the secret to premium, photo-quality keychains that command a higher price.
Quick Pre-Making Checklist
Run through these points before starting either method:
- ✅ Acrylic blanks clean and dry
- ✅ Design sized to match blank shape
- ✅ Adhesive vinyl loaded face-up — no mirroring
- ✅ Sublimation ink loaded in printer (not regular ink)
- ✅ Heat press preheated to 400°F for sublimation
- ✅ Heat-resistant tape ready for paper alignment
- ✅ Tassels and pliers on hand for finishing
Troubleshooting Common Issues
Even simple projects have a few pitfalls. Here's how to fix the most common ones.
Sublimation design looks faded or washed out
The issue: Colors appear dull and lack contrast after pressing.
Why it happens: Incorrect temperature, too little pressure, or using standard ink instead of sublimation ink.
The fix: Confirm your printer is equipped with true sublimation ink. Increase pressing time by 10-second increments. Make sure the heat press is fully preheated to 400°F before pressing.
Adhesive vinyl lifting from the acrylic edges
The issue: The vinyl peels up at the corners after application.
Why it happens: The blank wasn't cleaned properly, or the edges weren't burnished firmly.
The fix: Clean the blank again with rubbing alcohol. Re-burnish the lifted edges and let the adhesive set for 24 hours. For items handled frequently, avoid placing designs too close to the edge.
Acrylic blank cracks when punching a hole
The issue: The blank splits or chips when creating a hole with an awl.
Why it happens: Too much pressure, or the blank is too thin/rigid.
The fix: Work slowly with light pressure, and if possible, use a drill with a fine bit designed for plastic. Better yet, buy blanks with pre-drilled holes to skip this step entirely.
FAQ
Can you make acrylic keychains with UV resin?
Yes — UV resin is a fantastic way to create custom keychain blanks or seal existing vinyl designs. You can pour resin into silicone molds, add pigments or sequins for sparkle, and cure it under a UV lamp. Once cured, you can apply adhesive vinyl or fill the back with a design and seal it with another resin layer for a professional, dimensional look.
Can you sublimate on an acrylic keychain?
Yes — but you need acrylic blanks specifically coated for sublimation. The polyester coating is what accepts the sublimation ink. Standard clear acrylic without coating won't work. Check the product description before purchasing, and always press at the recommended temperature and time for the blank material.
How do I make acrylic keychains with pictures?
The best way to put photos on acrylic keychains is sublimation. Print your photo onto sublimation paper using sublimation ink, then heat press the image onto a sublimation-coated blank at 400°F for 40–60 seconds. This creates a permanent, photorealistic transfer that won't crack or peel. Printable adhesive vinyl is another option, but it won't match sublimation's color fidelity or durability.
Can I sell the acrylic keychains I make?
Absolutely — handmade acrylic keychains are a popular, profitable product for craft fairs, Etsy, and small online shops. The key to success is consistency: use quality blanks, perfect your application process, and develop signature designs that customers can't find elsewhere. Both adhesive vinyl and sublimation methods are scalable for small-batch production, and with a reliable vinyl cutter and heat press, you can produce dozens in a single afternoon.
Keep Learning
Ready to level up your crafting skills? These resources will help you master every material and machine:


 Cart Unlocks Add-On Deals





