Introduction
Sublimation tumblers are everywhere — and for good reason. They're durable, endlessly customizable, and genuinely fun to make. Whether you're crafting gifts for friends or building a product line to sell, learning how to make sublimation tumblers opens the door to high-quality, professional-looking drinkware.
In this guide, we'll cover the entire process: what a sublimation tumbler is, the materials you'll need, step-by-step instructions, recommended temperatures, and answers to the most common questions. If you're new to sublimation or want a deeper dive into paper choices, our sublimation paper guide is a helpful starting point.
Key Takeaways
- Sublimation tumblers require a polyester-coated blank — the ink won't bond without it.
- Always mirror your design before printing — otherwise text appears backward.
- Press at 300°F (150°C) for 4–6 minutes using a tumbler press, mug press, or oven.
- Use heat-resistant tape and butcher paper for sharp, clean transfers.
- A conventional oven works, but requires manual rotation for even heating.
📚 Table of Contents
What Is a Sublimation Tumbler?
A sublimation tumbler is a stainless steel or plastic drinkware blank coated with a polyester layer that accepts sublimation ink during heat transfer. Without this coating, the ink has nothing to bond with — which is why you can't sublimate onto just any cup. The polyester coating is what makes the design vibrant, permanent, and smooth to the touch.
Sublimation tumblers come in a wide range of sizes — from slim 12 oz designs to larger 30 oz styles — and are used for everything from daily coffee cups to statement water bottles. Because the design is infused into the coating rather than sitting on the surface, it won't crack, peel, or fade the way vinyl or stickers eventually will.
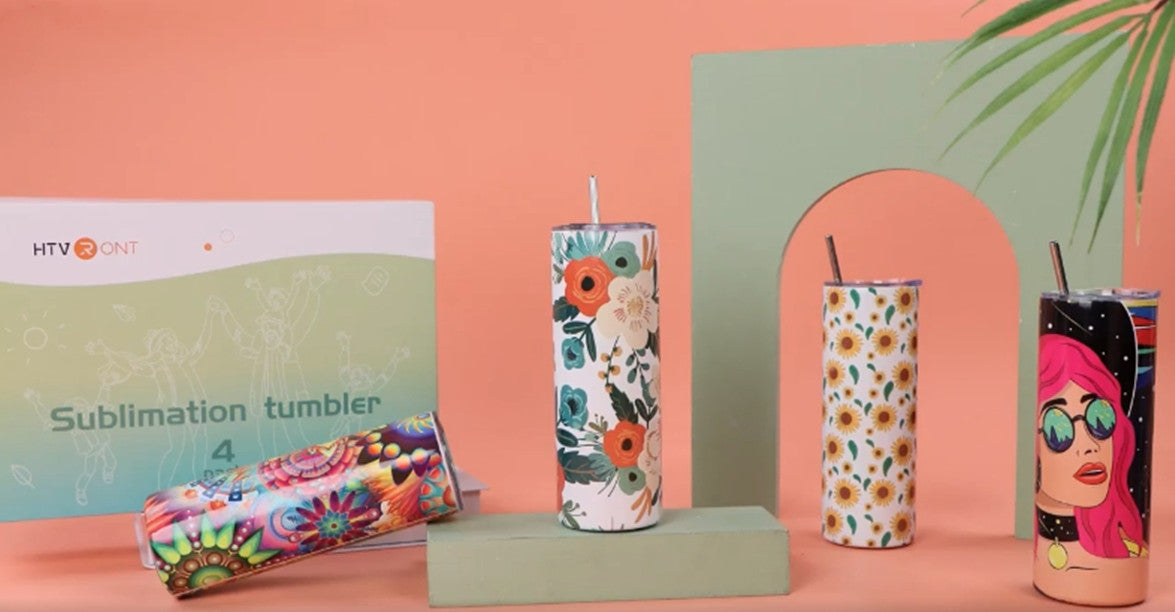
To press a tumbler properly, you'll want a tumbler heat press with a curved heating plate — flat heat presses won't wrap evenly around the cylinder. If you don't have a dedicated tumbler press yet, a conventional oven can work as an alternative, which we'll cover later.
Materials You'll Need
Gathering the right tools and materials before you start is the key to a frustration-free project. Here's everything you'll need:
-
A sublimation printer — an inkjet printer equipped with sublimation ink (standard ink won't work)
-
Sublimation paper — HTVRONT's A4 8.5" x 11" sheets offer a 98% transfer rate and fast drying
-
A sublimation tumbler — with the proper polyester coating
-
A tumbler heat press or mug press — or a conventional oven as a backup
-
Butcher paper — to protect the press and catch excess ink
-
Heat-resistant tape — to hold the design in place during pressing
-
Heat-resistant gloves — tumblers get extremely hot, trust us
Step-by-Step: How to Make Sublimation Tumblers
Step 1: Design Your Image
Create your design in any software you're comfortable with — Cricut Design Space, Silhouette Studio, Illustrator, or even a free editing app. The design can be a typographic quote, a pattern, or even a photo of family and friends. Measure your tumbler and size the artwork to match, leaving a small margin around the edges to avoid stretching or distortion.
Step 2: Print Your Design in Reverse
Load sublimation ink into your printer, then print your design onto sublimation paper.
Why mirror your print? The design is placed face-down on the tumbler during pressing. If you don't reverse it, text and logos will transfer backward. Always enable the "mirror" or "reverse" option in your printer settings before printing.
Step 3: Prepare the Tumbler
Clean the entire surface of the tumbler with a lint-free cloth. Any dust, oil, or residue will show up as defects in the final print. For best results, wipe it down with rubbing alcohol and let it dry completely. Why this matters: sublimation ink needs direct, clean contact with the polyester coating — even a fingerprint can cause a visible blemish in the final design.

Step 4: Transfer the Design
Wrap the printed sublimation paper around the tumbler with the design facing down against the surface. Secure it tightly with heat-resistant tape — this is critical, because any gap between the paper and the tumbler will cause blurry or faded areas. The tighter the wrap, the sharper your transfer.

Preheat your tumbler heat press to around 300°F (150°C). Insert the tumbler and press for approximately 4–6 minutes. Follow the manufacturer's guidelines for exact temperature and time, as different presses may vary slightly.
Step 5: Remove the Sublimation Paper
Once the pressing is complete, carefully remove the tumbler using heat-resistant gloves — it will be extremely hot. Let it cool for a few minutes before peeling away the sublimation paper. The design should now be fully transferred and embedded into the tumbler's coating, with a smooth feel and vibrant colors.

Step 6: Inspect the Final Result
Check the tumbler carefully for any areas that didn't transfer properly. If you spot light patches or faded sections, the paper likely wasn't tight enough — or the temperature was inconsistent. You may be able to re-press the tumbler briefly to fix minor issues, though major defects are harder to correct. The more you practice, the more consistent your results will become.

Recommended Settings at a Glance
Here's a quick reference for the most important sublimation tumbler parameters:
| Setting |
Recommendation |
| Temperature |
300°F (150°C) |
| Pressing Time |
4–6 minutes |
| Pressure |
Medium to firm |
| Mirror Print |
Yes — always |
| Paper Type |
Sublimation paper |
| Ink Type |
Sublimation ink only |
Tumbler Press vs. Oven: Which Is Better?
Both methods can produce beautiful sublimation tumblers, but they require different approaches. Here's a quick comparison:
| Feature |
Tumbler Press |
Conventional Oven |
| Heat Distribution |
Even, wraps around the tumbler |
Less even — requires manual rotation |
| Time Required |
4–6 minutes, mostly hands-off |
Longer, requires constant monitoring |
| Consistency |
High — reliable results batch after batch |
Varies — results depend on oven and technique |
| Best For |
Serious crafters, sellers, frequent production |
Occasional projects or testing the craft |
If you plan to make tumblers regularly or sell them, investing in a dedicated tumbler heat press is worth it. The consistency alone will save you time, materials, and frustration.
Quick Pre-Pressing Checklist
Run through these points before every pressing session:
- ✅ Design printed in reverse (mirror mode enabled)
- ✅ Sublimation ink loaded in the printer — not regular ink
- ✅ Tumbler surface cleaned with rubbing alcohol
- ✅ Paper wrapped tightly with no gaps or wrinkles
- ✅ Heat-resistant tape securing all edges
- ✅ Press preheated to 300°F (150°C)
- ✅ Heat-resistant gloves ready for removal
Common Mistakes to Avoid
Avoid these common errors to get better results from your very first tumbler:
- ❌ Forgetting to mirror the design
- ❌ Using regular inkjet ink instead of sublimation ink
- ❌ Skipping surface cleaning before pressing
- ❌ Wrapping the paper too loosely around the tumbler
- ❌ Pressing at the wrong temperature or for too little time
- ❌ Removing the sublimation paper while the tumbler is still too hot
Troubleshooting Common Issues
Even experienced crafters run into problems. Here's how to solve the most common ones.
Design looks faded or washed out
The issue: Colors appear dull, light, or lack contrast.
Why it happens: Insufficient temperature, too little pressure, or the paper wasn't tight enough against the tumbler.
The fix: Increase pressing time by 30–60 seconds and make sure the paper is wrapped as tightly as possible. Also confirm your printer is using genuine sublimation ink — regular inkjet ink won't sublimate and will produce poor results.
Dark spots or scorch marks
The issue: Brown or yellow patches appear on the tumbler.
Why it happens: Overheating, or moisture trapped between the paper and the tumbler.
The fix: Reduce the pressing time slightly, and make sure the tumbler is completely dry before applying the paper. Use butcher paper to absorb excess ink and prevent direct contact with the heating element.
Design transferred backward
The issue: Text and logos appear reversed on the finished tumbler.
Why it happens: You forgot to mirror the image before printing.
The fix: Unfortunately, this one can't be fixed after the fact — you'll need to start over with a new printed design. Always double-check your printer settings before printing.
Frequently Asked Questions
Can you sublimate on stainless steel tumblers?
Yes — but only if the tumbler has a sublimation coating. Standard stainless steel alone won't accept sublimation ink. Look for blanks specifically labeled as "sublimation tumblers" — these have a polyester coating that allows the ink to bond permanently.
Can you sublimate in a regular oven?
Yes, you can use a conventional oven as an alternative to a tumbler press. The principle is the same: heat activates the sublimation ink. You'll need to rotate the tumbler periodically to ensure even heat distribution. A dedicated tumbler press is easier and more consistent, but an oven works fine for occasional projects.
How do I remove sublimation ink from a tumbler?
White vinegar is the most practical option. Soak the tumbler for about 90 minutes, then rub with a cloth. Full removal is difficult because sublimation ink becomes part of the coating — prevention, like checking mirror settings and alignment, is always best.
What temperature should I use for sublimation tumblers?
Most tumbler heat presses work best at around 300°F (150°C) for 4–6 minutes. Different machines and tumbler sizes may require slight adjustments, so always check the manufacturer's instructions first.
Keep Learning
If you're excited about sublimation tumblers, these resources will help you master the craft even further:


 Cart Unlocks Add-On Deals





